Tools:
Screwdriver, Hammer, Saw, Utility Knife, Paint Brush, Square, Ruler, Tape
Measure
Procedure:
1. Determine your screen size (I have a screen calculator for Excel that might
help-email me and put screen
calculator in the subject.) or if your browser will except Excel
Files - cleck here now
to use the screen calculator.
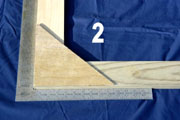
2 Cut the 1 x 4’s to the correct length. Keep in mind that the 1 x 4 actually measures 3 ½ inches wide when you figure your overall length. Use your screen size plus 4 ½ inches. (This distance is for the width of the trim molding top-bottom and left-right.) Lay out the rectangular frame making sure it is perfectly square. You can determine if the fame is square by measuring each diagonal. If the measurement is the same, the frame is square. (See photo 1)
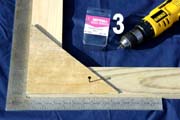
3. Cut four triangular ¼ plywood gussets. Using wood glue, screws or nails, attach the gussets to the 1 x 4 corners. (See Photo 2 and 3)
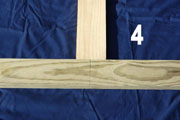
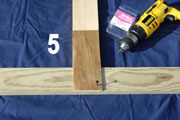
4. Add one 1 x 4 center support and attach as in 3 above. (See photo 4 and 5)
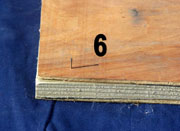
5. Flip the frame over and cut the two sheets of ¼ plywood to fit the frame. Be sure to keep the seam tight in the center. I attached using only 1 x 7 wire brads. (See photo 6)
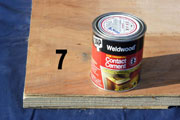
6. Apply contact cement - Very Important Note: Make sure you purchase the original flammable type. The "non-Flammable" cement is very weak and doesn't really bond anything. It's basically a rubber cement and will not hold the plastic to the plywood. (Make sure that both the frame and the plastic have reached room temperature before attaching. Allow to stand overnight. Due to expansion and contraction, the plastic will bulge off the frame in small saucer shape circles if both are not exactly at the same temperature.) to the plywood surface (this may require two coats if too much of the glue has absorbed into the plywood) and the backside of the Parkland Plastic. At this point, it might be best to leave the plastic oversize and then trim off the excess after it is attached to the frame. Follow directions on the can for application and drying. (photo 7)
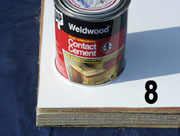
7. Attach the plastic to the plywood. The rougher of the two sides is the projection side. (Be most careful here) Get one side as square as possible and roll the plastic, pushing out any bulges as you go. (An extra body can really help here.) Once the plastic touches the plywood, it’s not coming off. You can now trim off the excess plastic hangover using a utility knife. (photo 8)
8. Paint the 2 ¼ door/window trim before cutting to length.
9. Measure and cut the molding to the exact screen size. (Be sure and measure the length on the inside edge and cut your miter from this mark.
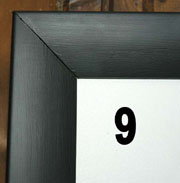
10. Attach the molding to the frame using finishing nails. Make sure to keep everything in square. (See photo 9)
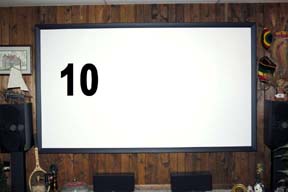
11. Hang the screen on the wall like a picture. There are different ways to do this. I used two small turnbuckles and attached a small bolt into the stud. I then had about 2 inches up or down for fine adjustment. (Photo 10).
I have had my screen up now for two years with no problems. Let me know if
I can give you any more help, Ron